Are you a music enthusiast, dreaming of setting up your very own home recording studio? Creating a space where you can unleash your creativity and produce professional-quality recordings is an exciting endeavor. But where do you begin? In this article, we will guide you through the process of building your home recording studio, step by step.
Firstly, let’s talk about the heart of your studio: the equipment. A good starting point is a computer or laptop with ample processing power and storage capacity. You’ll also need a digital audio workstation (DAW) software, such as Pro Tools or Logic Pro, to record, edit, and mix your music. Don’t forget quality studio headphones for accurate monitoring.
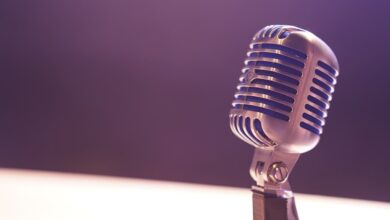
Next, let’s focus on sound. Achieving optimal acoustics in your recording space is vital. Consider treating your room with acoustic panels to minimize unwanted echoes and reverberations. Bass traps are particularly useful for controlling low-frequency resonance. Additionally, investing in a condenser microphone and microphone stand will allow you to capture crystal-clear vocals and instruments.

Now, let’s tackle the issue of connectivity. Ensure you have an audio interface, which acts as the bridge between your microphones and instruments and your computer. It converts analog signals into digital data that can be processed by your DAW. Take into account the number of inputs and outputs you require based on your recording needs.
To enhance your recordings further, take a look at the peripherals. A MIDI keyboard will enable you to add virtual instruments and create melodies effortlessly. Studio monitors are essential for accurately listening to your mixes and ensuring they translate well to other systems. And don’t forget about cables, pop filters, and a comfortable chair for those long studio sessions!

Lastly, keep in mind the importance of organization and ergonomics. Arrange your equipment in a way that maximizes workflow and minimizes clutter. Create a clean and inspiring environment that motivates you to create your best work.

Building your home recording studio is an exciting journey that allows you to bring your musical visions to life. By carefully selecting the right equipment, optimizing your acoustics, and considering connectivity and peripherals, you can create a space that nurtures creativity and delivers professional-quality results. So, what are you waiting for? It’s time to start building your dream home recording studio and embark on an incredible musical adventure!
Unleash Your Musical Creativity: Essential Tips for Building Your Home Recording Studio
Are you ready to embark on a musical journey like no other? If you’ve ever dreamed of creating your own music, it’s time to unleash your artistic potential and build your very own home recording studio. With the right tools and mindset, you can transform your ideas into melodic masterpieces that resonate with your audience. In this article, we’ll explore essential tips for building a home recording studio that will empower you to capture the essence of your musical creativity.
-
Find Your Space: Start by identifying a dedicated area in your home where you can set up your studio. It could be a spare room, basement, or even a cozy corner. This space will serve as your creative sanctuary, so make sure it offers the privacy and tranquility you need to immerse yourself in the music-making process.


Acoustics Matter: The quality of sound in your recordings depends greatly on the acoustics of your studio. Consider incorporating soundproofing materials such as foam panels, bass traps, and diffusers to minimize unwanted echoes and reverberations. Experiment with different placements to fine-tune your sound.
-
Essential Equipment: Investing in high-quality equipment is crucial for producing professional-grade recordings. Start with the essentials: a computer or laptop with ample processing power, a digital audio workstation (DAW) software, studio monitors, headphones, a microphone, and audio interfaces. Opt for reputable brands known for their reliability and performance.
-
Capture Clean Sound: A good microphone is your gateway to capturing clear and pristine sound. Choose a microphone that suits your recording needs, whether it’s vocals, instruments, or both. Additionally, consider adding a pop filter to reduce plosive sounds and a shock mount to isolate the microphone from vibrations.
-
Treat Your Room: To achieve optimal sound quality, address any room-related issues by employing acoustic treatment. This includes strategically placing absorption panels on walls and ceilings to minimize reflections and diffusers to scatter sound waves evenly. Experimenting with room treatment will enhance your recordings.


Master the Mixing Process: Once you’ve recorded your tracks, it’s time to bring them to life through mixing. Learn the fundamentals of EQ (equalization), compression, reverb, and other effects to balance and polish your sound. Explore tutorials, online courses, and forums to refine your mixing skills.
-
Create a Comfortable Environment: Surround yourself with inspiring elements that ignite your creativity. Hang posters of your favorite artists, set up mood lighting, or add plants to infuse positive energy. A comfortable environment fosters musical flow and sparks innovative ideas.
Now that you have a glimpse into the essentials of building your home recording studio, it’s time to roll up your sleeves and turn your musical aspirations into reality. Remember, practice makes perfect, so don’t be afraid to experiment, learn from others, and embrace your unique voice. Let your creative spirit soar as you embark on this captivating journey of musical self-expression.
From Hobbyist to Pro: Transforming Your Space into a Professional Home Recording Studio
Are you a music enthusiast with dreams of turning your hobby into a professional pursuit? Imagine having the ability to create high-quality recordings from the comfort of your own home. With some careful planning and a few key investments, you can transform your space into a professional home recording studio. Let’s delve into the essential considerations and steps to achieve this remarkable transformation.
First and foremost, find the perfect location for your home studio. Look for a room that offers sufficient space and minimal external noise interference. Consider converting a spare bedroom, basement, or even a large walk-in closet. Remember, the right environment can make a world of difference in the quality of your recordings.
Once you have chosen the ideal space, it’s time to address acoustic treatment. Proper sound insulation and diffusion are crucial for achieving pristine recordings. Acoustic panels, bass traps, and diffusers can help control unwanted echoes and reverberations, resulting in a more professional sound. As the saying goes, “Good acoustics are the backbone of any great recording.”
Next, invest in high-quality recording equipment. A reliable computer or laptop with sufficient processing power and ample storage is a must. Additionally, opt for a professional-grade audio interface to ensure clear signal conversion between your instruments and the computer. A condenser microphone, studio headphones, and studio monitors are also essential tools for capturing and monitoring sound accurately.
To create a comfortable and inspiring work environment, pay attention to the ergonomics of your studio setup. Choose a sturdy and adjustable desk, an ergonomic chair, and proper lighting to minimize fatigue and optimize your productivity.
Don’t forget about cables, stands, and accessories. Good cable management prevents messy tangles and ensures reliable connections. Sturdy microphone stands and boom arms provide flexibility and stability during recording sessions. Additional accessories like pop filters, reflection filters, and MIDI controllers can enhance your workflow and creative options.
Lastly, immerse yourself in the world of digital audio workstations (DAWs). These software applications serve as the heart of your studio, allowing you to record, edit, mix, and master your music. Popular DAWs like Pro Tools, Logic Pro, and Ableton Live offer powerful features and intuitive interfaces for unleashing your creativity.
By following these guidelines and investing in the right equipment, you can successfully transform your space into a professional home recording studio. Embark on this journey with passion, persistence, and a commitment to honing your skills. Embrace the unlimited possibilities that await you, turning your musical dreams into reality.
Creating the Perfect Sound: Expert Advice on Acoustic Treatment for Your Home Recording Studio
When it comes to recording music in your home studio, achieving the perfect sound is essential. Whether you’re a seasoned musician or just starting out, understanding the importance of acoustic treatment can make a world of difference in the quality of your recordings. In this article, we’ll explore expert advice on how to optimize the acoustics of your home recording studio.
First and foremost, let’s address the elephant in the room – what exactly is acoustic treatment? Simply put, it’s the process of improving the sound quality within a space by minimizing unwanted echoes, reverberation, and other acoustic issues. By implementing effective acoustic treatment, you can create an environment that allows for accurate monitoring and precise recording.
One crucial aspect of acoustic treatment is addressing reflections. When sound waves bounce off hard surfaces such as walls, ceilings, and floors, they can cause unwanted echoes and colorations in your recordings. To combat this, consider using bass traps, diffusers, and absorbers strategically placed throughout your studio. Bass traps are particularly useful for controlling low-frequency buildup, while diffusers help scatter sound waves evenly, reducing flutter echoes. Absorbers, on the other hand, soak up excess sound energy, preventing reflections.
Another vital consideration is room resonance. Every room has its own set of resonant frequencies that can affect the accuracy of your recordings. Identifying and treating these resonances is crucial for achieving a balanced and transparent sound. One effective method is to use acoustic panels or foam on the walls to absorb mid and high-frequency reflections. Additionally, placing thick rugs or carpets on the floor can help reduce low-frequency resonances.
Remember, finding the right balance is key. You don’t want your studio to be completely dead, nor do you want it to be excessively boomy. Striking the right balance ensures that your recordings translate well across different listening environments.
Creating the perfect sound in your home recording studio requires careful attention to acoustic treatment. By addressing reflections and room resonances, you can significantly improve the quality of your recordings. Remember, it’s all about finding the right balance that suits your specific needs. So, take the time to experiment and fine-tune your acoustic treatment setup until you achieve the optimal sound for your home studio. Happy recording!
Budget-Friendly Solutions: How to Build an Affordable Home Recording Studio without Compromising Quality
Are you passionate about music and dream of recording your own songs or podcasts? Building a home recording studio can be an exciting and fulfilling endeavor. The good news is that you don’t have to break the bank to create a high-quality setup. In this article, we’ll explore budget-friendly solutions for building an affordable home recording studio without compromising on quality.
One of the essential components of a recording studio is the microphone. While top-of-the-line microphones can be expensive, there are excellent options available at more affordable prices. Look for dynamic microphones like the Shure SM58 or Audio-Technica ATR2100x, which offer great sound quality and versatility without emptying your wallet.
Another crucial aspect to consider is the audio interface. This device allows you to connect your microphone and instruments to your computer. Focusrite Scarlett and PreSonus AudioBox are popular choices among beginners and professionals alike. They provide excellent sound quality, multiple inputs, and are reasonably priced.
When it comes to recording software, there are several free and low-cost options available. Audacity is a popular open-source program that offers a wide range of features for recording and editing audio. For a more comprehensive solution, Reaper and Cakewalk by BandLab provide professional-grade capabilities at affordable prices.
Acoustic treatment plays a vital role in achieving optimal sound quality. You can improve the acoustics of your room without spending a fortune. Begin by placing foam panels on the walls to reduce echo and unwanted reflections. Additionally, using a reflection filter behind your microphone can help minimize room noise and improve vocal recordings.
Investing in a pair of studio headphones is a cost-effective alternative to expensive studio monitors. Look for headphones with a neutral frequency response, such as Audio-Technica ATH-M50x or Beyerdynamic DT 770 Pro. These models deliver accurate sound reproduction and are widely used in professional studios.
Building an affordable home recording studio doesn’t mean compromising on quality. By carefully selecting budget-friendly equipment, such as microphones, audio interfaces, software, and acoustic treatment, you can create a space where your creativity can thrive. Remember, it’s the passion and dedication you bring to your craft that truly matters, regardless of the size of your studio or the equipment you use. So go ahead, unleash your musical talent, and start recording your dreams from the comfort of your own home.